Why should you keep broken hockey sticks
Broken hockey sticks can be very useful for improving your stickhandling and other skills. In this article, we’ll show you how to save money on hockey training aids.
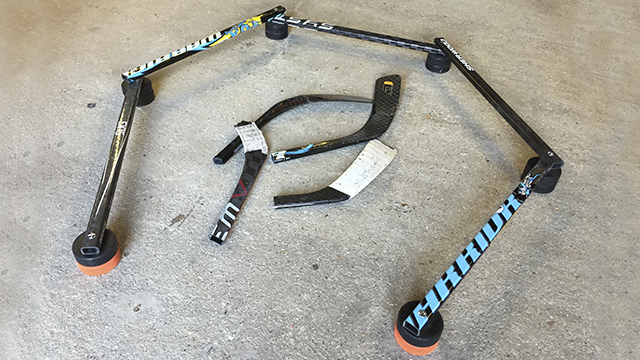
How to make hockey training aids from broken sticks
Measure and cut lengths of 60cm from sticks (odd number of lengths needed). Measure and mark 4cm from each end Drill a 6.5cm hole through the centre of the stick (both ends) Drill all the pucks with 6.5mm drill (through the centre).
Drill 20mm recess in the bottom pucks about half way through The ends of the frames (x2) will need assembling like so- push bolt through the stick and both pucks then mark with pen just inside the puck so the bolt won’t stick out the bottom once tightened.
Remove bolt and cut both to the desired length Reassemble bolt through stick, 2 pucks, small washer and bolt- be careful nit to over tighten so that you don’t crack the stick.
The pivoting joints will need assembling like so- push bolt through top stick, then use a large washer (to aid the pivoting action required), then through the second stick, then both pucks then mark with pen just inside recess in the puck so the bolt won’t stick out the bottom once tightened.
Remove bolt and cut the required amount to the desired length Reassemble bolt through first stick, large washer, second stick, 2 pucks, small washer and bolt- be careful not to over tighten so that you don’t crack the stick.


