

Start from scratch
Learning to hockey stop on your weaker side can sometimes be harder than learning to stop in the first place. Your whole foundation of learning must be turned completely around, you have to unlearn then learn again.
Best way to begin
Some might say the best way to learn is simply to practice (repetition, repetition) but I feel that learning how to applying the new skills your learning into every day skating is the quickest and most effective way of learning. If possible ask your ice rink and see if they would be willing to change the direction that people skate in during public session, normally you skate anti clockwise around the rink, perhaps suggest after every 30mins or 45mins (depending on the length of the session) see if they would be happy to change the direction to clock wise. As simple as this may seem, you’ll be able to learn the require skills on your weak side much more naturally as its being applied to your day to day skating.
Body position
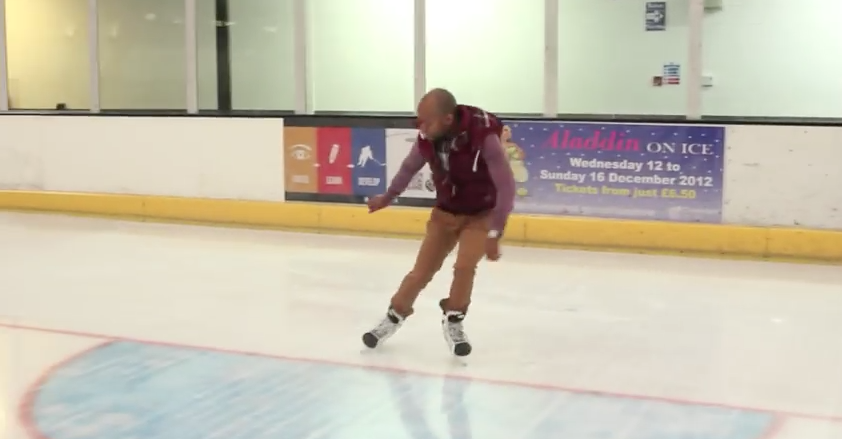
Your body position is always key when learning to stop, you need to keep the basics skills in mind:
Athletic body-
- Keep your skates around shoulder width apart
- Remember to keep your knees bent over the toe caps of your skates
- Shoulders square to the ice
- Head up so your not off balance
.
A great way to tackle learning the stop on your weaker side is by performing a few hockey stops on your strong side. Use these stops to feel where your body weight, what position your body and skates are in, and of course what edges your leaning on when your stopping. You can also do this by leaning against the barriers of your ice rink and putting your body into your normally hockey stopping positing to again feel for angle, weight and edges. Then perform the same task on your weak side to see what position you’ll need to be in to stop.

Once you’ve got an idea of what position your body needs to be in (on your weak side) to stop. Try performing a few slow and short hockey stops on the weak side using the techniques you were practicing against the barriers, remember what position your body was in and how you needed to lean to put your skates in the correct angle. Start very slowly and build confident and skill.

When learning its also important not to neglect your skates edges, they play a MASSIVE part in your stopping success.

Stopping with your skates toe caps pointing to the right: Be sure to lean on your left skates inside edge and your right skates outside edge

If your stopping to with your skates toe caps pointing to the left: Remember to lean on your right skates inside edge and your left skates outside edge

There are also a number of exercises or drills that you can perform on the ice to build your confidence slowly as you develop.
Drill 1 – Skate along the red lines on the ice and perform short slow hockey stops on your weak side as you learn to lean on the edges correctly, where to place your body weight, how to position your body. Start slowly and develop as your improve.
2 Mirror drill – Face one direction (perhaps practice at the top end of the rink and make sure your always facing the centre circle) of the ice rink and skate to the left and perform a slow hockey stop making sure that your upper body is still facing the same direction of the rink (centre circle) Then skate to your right and perform a slow hockey stop on your right side (with your upper body still facing the centre circle).
Performing the hockey stop slowly will build your skill as slow hockey stops require more balance, control and proper technique to ensure your skate edges do not dig into the ice. It will also help if your skates edges aren’t sharp. All of these examples can be found in the video tutorial below.

